Faux Shiplap RV Walls

This post includes affiliate links. For the full disclosure policy click here.

Ok. That was a crazy(unplanned!) break. But big things are brewing and changes are coming to both this blog and our space. More on that soon! Promise!

But now that I’m back to the blog life lets chat about RV walls. Specifically how we remedied the dark and dirty walls in our fifth wheel with some awesome faux shiplap! In case you forgot the way it looked before…. lets take a trip down memory lane:

Faux shiplap RV walls

[Right after we brought the fifthwheel home]

Faux shiplap RV walls

[Halfway through demo]

Most of the walls were covered in the beige wall paper but the slide out that houses our living room and dining room had a bit of extra flair. The bottom half had a decorative border of plastic faux stone tiles and dark stone wall paper. How a designer thought dark and stoney was a good look in such a tiny space…I will never know!

So these items had to go. ASAP! But after doing the demo we needed a way to cover the ugly bits. We thought about painting it but its such a small amount of wall we wanted to so something a bit extra. Enter faux shiplap!

We’ve all heard and seen the wood planks a certain tv star has made so popular recently. And I do love the look. But I dont need it covering all my surfaces. Plus, real shiplap is pretty dang heavy. So adding just a touch of the treatment was the trick!

Faux shiplap RV walls

We’ve used faux shiplap in some of our spaces before and the method is super simple. We cut down sheets of 1/4″ plywood on our table saw to 6″ widths and glued them straight to the wall. The look comes out best if you vary the grains as you are attaching them. In other words, dont glue them on exactly as they were in full sheets.

Faux shiplap RV walls

One Pinterest trick that seems to really help with spacing is using pennies! Yup, the same ones that are collecting in the bottom of your purse or center console of the car. Grab a handful and stick them between the planks to keep them perfectly spaced while the adhesive dries. Once everything has set for 24 hours pull them from the gaps and enjoy getting use out of that change cup!

Faux shiplap RV walls

You can leave the planks naked if you want a more natural look. I’d hit them with a quick coat of wax just to help protect the wood if you go this route. For us, we needed more contrast since the wood was nearly the same as the existing beige wall paper.

Faux shiplap RV walls Faux shiplap RV walls

We wanted to keep some of the natural woodgrain so we went with a white wash. I used my trusty chalk paint and mixed it up 1 part paint to 3 parts water. You can adjust to show more or less of your wood grain. Just use a scrap to test on as this dries a little different from how it goes on.

Faux Shiplap RV Walls

Also, Im kinda obsessed with my new mixing cup! Yes thats a hairdressers dye cup. You can get them at the beauty supply store for the whopping price of 99 cents! They’re cheap, have liquid measurement markers, and come with a convenient handle. I know you can get things similar at the hardware store but if I have a choice between 10 bucks or just 1… well, thats a no brainer!

I slap this wash on pretty quick(and without much precision LOL!) so it doesn’t have time to form lines from drying between sections. Once the planks have dried completely I add a coat of  wax and dry overnight. I didn’t want a shiny finish so I went super light on coverage and barely buffed it with a rag.

Faux shiplap RV walls

The section that is covered in the faux shiplap is relatively small but I feel like it still makes a big difference. This project is crazy affordable, easy to DIY, and looks good on just about any wall. Couldn’t be happier we added this to our tiny space!

So are you #teamshiplap? Have any gracing the walls of your home? You know Id love to hear all about it in the comments!

Faux shiplap DIY Faux shiplap DIY!
How to Faux Shiplap RV Walls
Faux shiplap RV walls
Continue Reading

Replacing RV Window Treatments

This post includes affiliate links. For the full disclosure policy click here.

Oh padded valances…. sigh. Why did you become an RV staple? I’ll never know! When we did all the demo on the fifth wheel I happily took out every last one. I knew this was something I’d do the day we first looked at this unit! It immediately brightened up the space and I was so excited to find new window treatments that kept all the pretty light!

Replacing RV window treatments

As you can see the valances also covered and enclosed the pull down day/night shades. After spending some time with these shades (and breaking one on our very first trip!) I knew they had to come out as well. Im sure people are cringing at the idea because shades are not cheap to replace but the idea of living full time with these was crazy. So out they went! Also, my fam doesn’t normally or intentionally match on demo day! LOL!

Replacing RV window treatments

Once everything was gone I realized I really wanted to preserve all that brightness. I looked at several different window treatments… roller shades, blinds, curtains… so many options! It became clear I was going to need multiple solutions to get both the look and privacy we needed.

Eventually I found these curtains on Amazon. Being that RV windows are crazy sizes I didn’t even bother trying to find ones sized to match. I ordered the biggest ones they had and planned to cut down to size. I really liked the linen texture and the sheer coverage. They let in a ton of light and they’re a fraction of the price of true linen.

Replacing RV window treatments

It took a few days to cut and hem all the panels to size but it was very simple sewing. All straight lines and long stitches! It took 3 sets total to make panels for all the windows and I puzzled out as many as possible per section. We installed light weight wrap around curtain rods to hang them on and even used some of the same holes left from the valances.

*Everything we’ve hung (pre-existing holes or not!) has been mounted with molly bolts. We find its the most secure way to hang anything permanent in our fifth wheel and works perfectly with the luan walls.

Replacing RV window treatmentsReplacing RV window treatmentsReplacing RV window treatmentsReplacing RV window treatmentsReplacing RV window treatmentsReplacing RV window treatments

When it came to the bedroom we wanted the option for a bit more privacy. I felt like I saw the same cheap rollers used in several RV makeovers. Im sure they are an inexpensive solution if you are working on a budget but again we are talking FULL TIME USE. And the one thing nearly everyone agrees on is the roller shades eventually loose their ability to roll back up. We aint got time for items that have a short shelf life! Ha!

So we headed to Home Depot to check out a few other options. After feeling a few window treatments in person we settled on Cordless Cellular Shades. If you buy them in the store they will also cut them to size for free while you do your other shopping. Obviously this was a perk as we needed some seriously non traditional sizes.

Replacing RV window treatments

The shades fit perfectly within the curtain rods we had and were incredibly easy to mount. The shades themselves are cordless and move up or down soooooo smoothly! We got the blackout versions which were a little more but totally worth it and doable since its only 3 small windows.

Replacing RV window treatments

In addition to the shades I also added a bit of tassel trim to the curtains in the bedroom. Im not 100% set on the bedroom color scheme for the new space but I know it will include some Navy as I plan to recycle some pieces from our loft. For now, this little addition is really perking up the simple window treatments!

Replacing RV window treatmentsReplacing RV window treatmentsReplacing RV window treatments

Have you replaced any window treatments in your living space lately? Is your RV full of bulky padded valances? Do you love em’ or hate em’? You know I’d love to hear all about it in the comments!

Replacing RV window treatments

How to replace RV blinds How to replace RV blinds!
Replace RV Blinds
Replace RV blinds
Replacing RV window treatments
Continue Reading

Replacing That Old Carpet

This post includes affiliate links. For the full disclosure policy click here.

Ok. We’re just jumping right into the heavy blog renovations here because… well… thats kind of how Q and I do things in real life! I showed you guys all those lovely before pics in the tiny tour post and now Im going to show you the crazy mess we made. I promise there’s a good ending to this story (fantastic faux hard wood!) but lets start with the guts. Purging the fifth wheel carpet!

Replacing fifth wheel carpet.

The majority of the fifth wheel was covered in this bland beige carpet. It was fine. It was also used. Which made my brain start thinking about how many spills, layers of dirt, pet funk, and other scary things happened in its short lifetime… the answer: too many! Besides, the germ factor with carpet is also not our style.

Replacing fifth wheel carpet.

So I took to Pinterest and google and read as much as I could handle about ripping the stuff out. The basics were all the same. Get a utility blade, cut along the edges, use super strength to tear that sucker out! And to be honest, thats really what this part of the demo consisted of. Luckily, I had my Pops(with his 30 yrs of construction experience) and cousin(with teenage muscles and stamina) to help out since Q was gone for this portion.

Replacing fifth wheel carpet.

There were only a few places we had to take special care. One was the edges of the slides. The corners are actually just small pieces of plastic that extend the visual line of the slide. They’re not strong enough to hold any weight but we wanted to floor to extend in the same fashion so we were careful to leave them in place. Getting around all the corners and tucked edges was not the easiest job! We found a pair of needle nose pliers and a nail puller worked wonders!

Replacing fifthwheel carpet

In addition to the carpet, we also took out all the tile print linoleum. This was only in a small part of the kitchen, hallway, and bathroom. Removing this was a cinch compared to the carpet! It came up in big sheets and was so easy to cut with the utility blade.

Once everything was out I removed about a billion staples and all the remnants I could get a hold of along the edges. This detail work took a lot longer than the initial demo. But the prep work here was so important it was a non-negotiable job!

Replacing fifthwheel carpet

Now to the fun stuff! New Floors! We read so many articles, reviews, and posts about which flooring to install. The two things we were most concerned with were weight and durability. Weight… well thats obvious. Nobody wants to add unnecessary weight to their trailer. Durability is a little more complicated. Whatever floor we put down needed to withstand the weight and wear of 2 huge slides rolling over it. Frequently! In the end we went with NuCore from Floor & Decor.

Replacing fifthwheel carpet

Its a floating floor that snaps together in planks. Its waterproof, has an anti-microbial finish, cork backing and can be cut with a simple utility blade. There are over 30 colors to choose from and TBH I think its really well priced! *And no, we are not affiliates!

16 boxes, 3 helpers, and several hours later our fifthwheel subfloor was completely covered! We were under a bit of a time crunch so we were happy so find how easily this came together.Just measure, cut, and snap in place. The fact we did the whole thing with just a utility blade ended up being a huge perk! The floor of the fifth wheel had so many odd angles and tight spaces I just cant imagine how crazy the cuts would have been on a saw. It was also great to skip nails/hardware all together on a project!

Replacing fifthwheel carpet

When it came to finishing out the slides we used 2 different trims. At first I wanted everything to match but as you can see the slides are very different so that wasn’t going to work.

The small area in front of the fireplace was a continuation of the kitchen which has a thick white base. After seeing both options in person it was clear white was best. This one is a small 90 degree pvc wall trim we found at Lowes.

For the living room slide we went with an unfinished oak stair trim from Home Depot. At first we thought we’d stain it to match but it turned out to be the same color as our furniture legs(more on that soon!) so its most likely going to be left as-is.

One tip we used(several times!) while putting this all together: test as you go. Throughout the whole process we pulled the slides in an out many times. Its better to make sure everything is going to work before you’ve laid the entire thing. We’d lay a chunk and then test a slide, lay & test, lay & test… you get the point! Our slides glide right over these without any problems. No buckling, shifting, or scratching. All of which we were worried about!

Replacing fifth wheel carpetReplacing fifth wheel carpet

One major project DONE! We’ve been to a handful of places and temps and we couldn’t be happier with this flooring. It was a big project but we knew it was essential to this renovation.

So tell me about your fifthwheel, rv, tiny home, etc flooring. Do you love it? Hate it? Considered replacing it? You know Id love to hear all about it in the comments!

Replacing that old fifthwheel carpet with fantastic faux hardwood!

Replacing that old fifthwheel carpet with fantastic faux hardwood!

Continue Reading

Home Tour: Loft Bedroom

Ok, this is a bittersweet post. Excited to share another Home Tour with you guys but it will be our last from the loft. Yep. We’re moving again! More deets on that later(promise!). But before we say goodbye to the loft lets check out the Bedroom since it had some of my favorite DIYs to date!

Home Tour: Bedroom

Copper Plant Stands: This was the first time I’ve worked with real copper pipes for a DIY and I was instantly hooked! This project comes together so quickly and requires very little supplies. Plus it dresses up even the most basic pots!

Home Tour: Bedroom

MALM Nightstand Hack: I feel like we’ve all had some variation or piece from the MALM collection. Its solid, inexpensive, and super affordable. Unfortunately its also very basic. Hacking these nightstands with hardware and chalk paint completely customized them with minimal effort.

Home Tour: Bedroom

Painted Throw Pillows: Speaking of minimal effort… these throw pillows were more like a coloring book exercise than full on DIY! I loved the design and price but they didnt fit our color scheme as-is. A little rose gold paint and fabric medium changed that real quick!

Home Tour: Bedroom

Rose Gold Lamps: A little rose gold paint was also key to these lamp makeovers. They started out a basic college dorm room lamp from Target. With a coat of rose gold paint and new shades they coordianted perfectly with the nightstand hack!

Home Tour: Bedroom

Painted Fabric Chair: This project was a long time coming! We bought this chair when we lived on the east coast with plans to reupholster. After a bit more research we quickly realized that project was way more work than we actually had time for so it sat as-is for some time. Once we moved into the loft I was ready to find a better solution and its no surprise I decided on paint. After a little research and a few fabric medium tests I found the perfect paint solution! Its been months and this is still my favorite reading spot.

Home Tour: Bedroom

Customized Planters: There are always those last few touches that complete any room. For me this generally revolves around plants(yes Im an aspiring #plantlady!). This post showed a few ways I customized store bought planters.

Home Tour: Bedroom

Home Tour: Bedroom

Gallery Wall: like I mentioned in the original post, I put these in every space we move into. I love the symmetry, repetition, and clean design it brings to our spaces. This hack helps get them up quickly and with minimal effort. Plus I love the subject in this set of prints! 😉

Home Tour: Bedroom

This loft bedroom was one of my favorite spaces. I loved the airy open feel and the gorgeous light we woke up to every morning. It may also be the most DIYs Ive managed within one space! So have you added any DIYs to your master bedroom? Tried any of the above in your own home? You know I’d love to hear all about it in the comments!

Home Tour: Bedroom
Continue Reading

DIY Marbled Diffuser

This DIY Marbled Diffuser post includes affiliate links. For the full disclosure policy click here.

Fall. We all love it right? One of the many reasons I love these next couple weeks is the cozy vibes and sinking into my inner homebody. Lately one of my favorite ways to up the cozy factor in our home is diffusing Essential Oils(EOs). My sweet cousin recently converted me into an oil lovin’ fool and I couldn’t be happier!

If you’re already diffusing EOs in your home you know the diffuser market is VAST. They come in every shape, size, and color you could dream up and there are some absolutely stunning options. When I bought my diffuser I wasn’t willing to commit to a super expensive option so I went with a well reviewed and super affordable model.

After using this in our home everyday for some time I decided the only way to love it more was to give it a makeover! You know I love paint and marbling(I swear that could have been another title option for this blog!) and it was the first thing I thought to try. Of course Im now completely obsessed and want to make these for every person I know. Spoiler alert for any family and friends… Santa’s making you marbled diffusers! Ha!

DIY Marbled Diffuser

Ok, so lets get down to the deets! Besides the actual diffuser you just need a container larger enough to roll your diffuser in, nail polish, scissors, a skewer, and painters tape. I also threw down some newsprint to protect my work surface but any drop cloth or scratch paper will work.

DIY Marbled Diffuser

I purchased this basic cool mist diffuser online. The body is plastic and made up of 3 main pieces. I removed the lid from the base and separated the cup from the cover.  Being able to take this apart is absolutely key! Obviously electricity and water don’t mix well so if you cant remove your lid completely I would not recommend this process.

DIY Marbled Diffuser

Once everything was separated I masked off the hole on top and the bottom edge with painters tape. It can be a little tricky getting the tape to follow the edge exactly so I slapped on a few pieces and used scissors to cut off the excess.

DIY Marbled DiffuserDIY Marbled Diffuser

When everything was taped off I got to the fun stuff… making the marble! I filled up the container with enough water to bring the marble close to the top. If you want to ‘dip’ vs ‘roll’ you need your container to be deep enough to accommodate the whole lid. Personally I like to ‘roll’ but you can practice on other items to find your own marbling style.

DIY Marbled Diffuser

After I poured a few layers of paint(quickly) onto the surface I swirled with a skewer. The pattern you see on the surface isn’t going to transfer as-is onto your lid so don’t overthink it. Just swirl enough to get a random pattern.

DIY Marbled Diffuser

Then I got to rolling! I had to roll three times to overlap the sides and top but I didn’t have to reload the paint. Overlapping also created a more random look so it was #winning all around! I left the lid on some newsprint to dry for a full 24 hours. It might have been overkill but I wanted to make sure the paint was completely cured before reassembling.

DIY Marbled Diffuser

Once the 24 hours was up I loaded it with water and a few drops of EOs and fell in love all over again! Ok, ok, that may be a bit much but honestly I sat there admiring my handy work for a good 5 minutes. Im so excited with how this came out and how easy it will be to replicate!

So have you started using EOs in your home? Is your diffuser in need of a makeover? You know I’d love to hear all about it in the comments!

Give your Essential Oil game a fabulous makeover with this DIY Marbled Diffuser. Best of all, it takes just a few items you probably already have on hand! Give your Essential Oil game a fabulous makeover with this DIY Marbled Diffuser. Best of all, it takes just a few items you probably already have on hand! Give your Essential Oil game a fabulous makeover with this DIY Marbled Diffuser. Best of all, it takes just a few items you probably already have on hand! Give your Essential Oil game a fabulous makeover with this DIY Marbled Diffuser. Best of all, it takes just a few items you probably already have on hand!

DIY Marbled Diffuser
Give your Essential Oil Diffuser a fabulous makeover with this DIY marbling technique!

Continue Reading

Home Tour: Kitchen

Its been a while since we moved into our loft. For quite some time the kitchen was in a constant shuffle. Its one of the most used spaces and I may(ok, definitely) be particular about how things are situated. My only excuse is that I do 99% of the cooking in our home. Ha! So now that things are just right I thought it was time to share the Kitchen Tour!

Home Tour Kitchen

This post includes affiliate links. For the full disclosure policy click here.

One of the best things we did when we moved in was make this kitchen island. We have shuffled the contents here and there but overall its stayed the same. And we LOVE it. This adds so much extra storage to our kitchen and our most used items are conveniently within reach.

Home Tour Kitchen

Some of the shelves are open for storing larger items and others we’ve found containers for. We’ve used a combination of collapsible bins and magazine organizers for most everything. And lastly, we found the perfect adjustable wine storage! This took some trial and error but when this is built into a square it fits perfectly in the cubes of the expedit shelves.

Home Tour Kitchen

We also attached this magazine rack to the far side for lid storage. I just love these things! I’ve used them for years even before we built this island. They have been discontinued at the stores(Ikea) but you can still grab similar ones on Amazon. Ive attached them to kitchen carts and even the inside of kitchen cabinets. Its honestly the best way I’ve found to keep lids organized so far.

Kitchen Tour

Other easy organizing products Ive found are wood trays and chalkboard labels. The trays I’ve painted to match the rest of the decor in the kitchen. And yes, of course I used chalk paint and wax! So far these have held up really well and the wax finish cleans well with just a wet rag. The labels I found on Amazon and I use them on EVERYthing! I cut them to fit on smaller jars and use the full labels for larger canisters.

Kitchen Tour

The other thing Ive added here and there is plants. I used to have the hardest time keeping ANY plants alive but something about this place is turning that right around! I think the amount of light we get in the loft is playing a big part. It may also be the plants themselves. Ive narrowed it down to a few varieties that are pretty indestructible. Generally speaking, I can keep succulents and philodendrons alive. Lets all cross our fingers that they are still alive after this is published. Ha!

Kitchen Tour

Kitchen Home Tour
Home Tour: Kitchen Edition. Check out the loft kitchen with DIY island for tons of extra storage!

So what organizing products or DIYs are you using in your kitchen? Are plants taking over your countertops too? You know Id love to hear all about it in the comments!

Continue Reading

Modern Painted Antlers

This post includes affiliate links. For the full disclosure policy click here.

Modern Painted Antlers

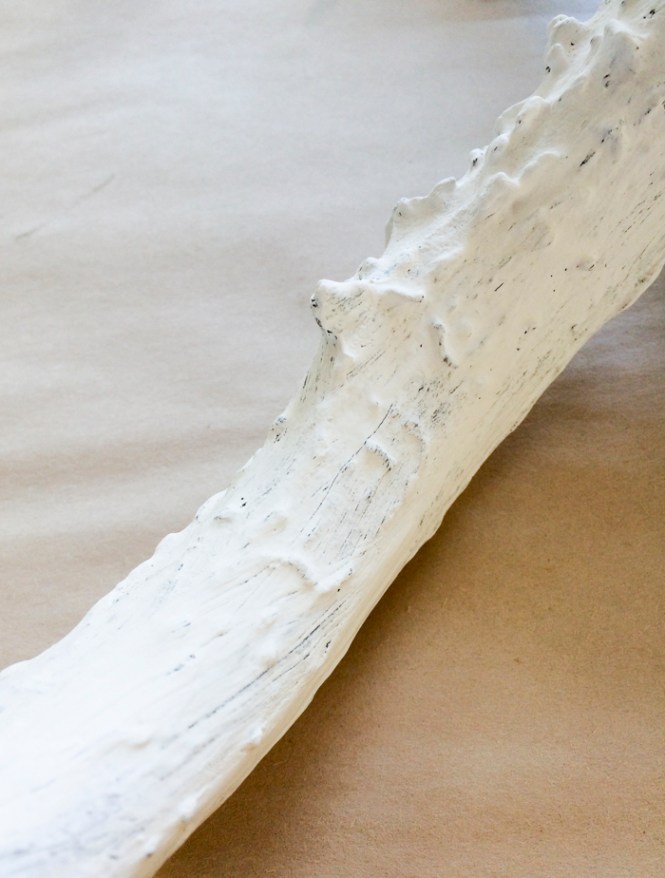
I grew up in a house of hunters. My husband also grew up in a house of hunters. We both lived with antlers and other taxidermy trophies and it was only a matter of time before they made it into our home as a couple. The only problem I had with this is the style or “look” they imply. See, we arent cabin, lodge, woodsy, etc kind of people within our own space. Its just not us. #nojudgement So a few coats of paint later and we are loving our “new” modern antlers!

Modern Painted Antlers

The set on the left is one Q actually hunted when he was a kid. They are sentimental and I’ve been trying to find a way to integrate them into our space for quite a while. The set on the right is from Target and completely ceramic. They are both ok on their own but neither fit our style or space.

Ive seen a bunch of tutorials and antler makeovers using spray paint but I really wanted to stick to the color pallet we chose for the living room. And finding those exact colors is basically impossible. So I used the Ceramcoat Select from Delta to mix my colors to an exact match. Its the first time I’ve used these satin finishes and I totally loved them!

Modern Painted Antlers

I separated the real antlers from the plaque to make painting easier. I wiped everything down with a damp rag to remove dust and thats it. Im not big on prep work… are you guys picking up on that? Ha!

Being that these would be mounted and nearly never handled I wasn’t too concerned with primers or sealers. I just laid out some newsprint and started slapping on the acrylic!

Modern Painted Antlers

[after 1 coat of acrylic paint]

Modern Painted Antlers

I used bristle brushes to really work the paint into the uneven surface of the antlers. It took 2 solid coats to get full coverage[see above for coverage after 1 coat] and I did a little bit of touch up on the real knobby bits.

Modern Painted Antlers

Painting over the fur was a bit different. It took 3 coats to really cover everything and I used a softer synthetic brush. Also, you need to paint with the grain so this dries “laying down”. The paint will make the fur stiff so you want to be aware of how you are directing it.

I let this dry for a full 24 hours before attempting to hang them up. And again, I did not seal these. If you wanted a different finish(glossy/high shine) Im sure you could hit them with a coat of spray on.

Modern Painted Antlers

Now lets talk hanging hardware. I’ve never been shy about decorating our walls whether we were renting or owned. And over the years I’ve tested a number of different hardware. I know that’s probably making some of you cringe because you’re team “don’t destroy the drywall”! But! I think I’ve found a pretty good compromise.

I picked up this multi-pack of hangers from High & Mighty a while ago and I’m thoroughly impressed! (No, I’m not affiliated with H&M) They can hold an insane amount of weight for their size and they only make a hole the size a thumbtack would leave. Thats tiny! And, even better, they’re a tool free product. #winning

Modern Painted Antlers

I am loving this makeover and I cant wait hear what a few of my “traditional hunters” think! So would you paint a set of antlers? Have you already given a taxidermy piece a mod makeover? You know I’d love to hear all about it in the comments!

Continue Reading

Home Tour: Bath

This post includes affiliate links. For the full disclosure policy click here.

Its been over a year since Q and I celebrated our 10th anniversary in the Dominican Republic. That said, not a day goes by I don’t think of at least some part of that trip. It was just one of those amazing once in a lifetime experiences. Part of the magic there was the morning we spent at the spa. The building, decor, and general vibe was amazing and incredibly calming. So its no surprise its been one of my biggest inspirations while decorating the loft bath!

When I started collecting items to pull together this look I wanted to focus on a couple specific elements and feelings. Yes, I said feelings. You know that sense of calm that washes over you when you step into a spa. Its the one that says “its time to relax”, “you deserve a touch of luxury”, and “this is a peaceful space” all in one…. ya, you know what Im talking about! I also wanted to pull tropical elements without crossing the line into “beachy”. Not that beach is a terrible theme but I had a grandma with a beach bathroom complete with those seashell soaps no body was allowed to use. You know the kind! Nothing about that side of beach decor says resort spa to me(sorry grandma!).

Home Tour: Bath

One of the elements I saw repeated throughout the spa that I just couldn’t get enough of: oversized foliage. They used leaves to line tall lanterns, under piles of crisp white towels, and as coasters for your cucumber water. Obviously I don’t have an endless supply of fresh banana leaves here in San Jose so I turned to faux stems. Luckily there are so many awesome products out there for “life like” foliage! I picked up this oversized Split Leaf Philodendron at Michaels but Palms or a Monstera would be lovely as well.

Home Tour: Bath

With the cabinets, tiles, and sink already fulfilling the crisp white quota for that spa feel I only needed to add a few touches of color. I pulled the blues and neutrals from the prints below which were hand-me-downs I’ve had for years. The color pallet in these prints could not have been more perfect for this resort spa vibe! I just picked up a set of distressed frames and used them sans glass.

Home Tour: Bath

Another element I saw repeated heavily was natural textures. They had giant stone planters, raw wood shelving, teak shower decks and several other fabulous natural materials throughout the spa. I rummaged through the items I had on hand  and found a fairly good mix! You’ve got to love shopping your own stash! #winning

Home Tour: BathHome Tour: BathHome Tour: Bath

After the straw/palm, rope, and leather pieces were added to the mix I was picking up momentum on the project. But there was stiiiiiiill just something missing… I couldnt put my finger on it. Until I saw the teak tissue cover! Ha! It seems like a silly little thing but I knew it was the last natural “element” I was missing in my mix. I ordered the matching tub caddy the same day and I’ve been obsessed since. No spa is complete without legit aqua-therapy!

The last couple items are classics: salts and candles. We are all about that detox salt soak and I buy the salt in bulk. Having a pretty jar means I can store them out on the countertop which is great when you are short on vanity storage space. The candles are a mix of scents and sizes I pick up whenever I find something I like. Im pretty picky about scents but a little aromatherapy can totally change a space. Plus, a softer light (like a few well placed candles) can really set a sense of calm.

So are you feeling that resort spa calmness yet? I know I am! Have you used any of these elements to create your own spa vibe? Have any other spa tips to share? You know I’d love to hear all about it in the comments!

Home Tour: Bath
Creating a spa atmosphere at home can be a fabulous way to relax. We took inspiration from our last tropical resort trip to DIY an at home spa. Check out the details!

</div

Continue Reading

Home Tour: Front Door

This post includes affiliate links. For the full disclosure policy click here.

Our loft has rows and rows of the same door/light/number entries and while they’re clean and fairly new they’re also fairly boring! I know we aren’t the only renters with this dilemma. When you live in an apartment your entryway is most likely going to look like eeeeeevery body else’s. But that doesn’t mean it needs to stay that way! You can absolutely personalize your front door and entryway to make your rental space unique.

Home Tour: Front doorDoormats:

This is probably one of the first things we add to any new space. Its functional since it cuts down on the dirt tracked into our place as well as decorative. If you’re feeling crafty your can DIY a design on a solid mat. Or you can shop any of the billion designs online(seriously theres bound to be a design perfect for your space!). We grabbed this one at Target.  Home Tour: Front DoorPlants:

Its no secret I hope to become a #plantlady and let our space be taken over by fabulous green lovelies. And our entry way is no exception! I knew I wanted something green to liven up the space but sunlight was an issue. We basically enter by hallway(even though its outdoors) which means there is very little sun. This limited our choices a bit and I’m pretty positive you wont find bright flowers gracing our front door but I’m ok with that. Luckily succulents and other non-fussy plants are popular and finding something for this nook was easy. I rarely have to water this Dragon Tree and its thriving even without great sun exposure.  Home Tour: Front DoorWreaths:

With the help of removable hooks even us renters can add wreaths to our front doors! You can find them in nearly any color so they are no longer just for the holidays. Yay! I loved this mushroom wreath the second I saw it and I know I can add decorative bits to dress it up throughout the year. Its made of dried and dyed mushrooms and it adds a ton of texture. If our front door got a lot of exposure to the elements I’d look for something less fragile. In this case, Im using that hallway to our advantage. Home Tour: Front DoorIts only a couple simple items but it changes the look of our entryway and livens up our space. So what are your favorite ways to decorate the front door and entryway? You know Id love to hear all about it in the comments!


Home Tour: Front Door
Continue Reading

The DIY Desk: Part 2

This post includes affiliate links. For the full disclosure policy click here.

Last week I shared Part 1 of the DIY Desk project. Part 1 was mostly about the desk top and basics but if you saw the post and/or pictures you know we altered part of our design to incorporate a few pieces we already had. Which brings us to Part 2! We used a couple of the same tricks to upcycle our old storage into a pair of fab modern farmhouse pieces.

DIY Desk Part 2

We’ve had this cube storage system for many many years. I bought them back in my scrapbooking heyday and they have served me well. (They’ve since been retired but you can find similar ones here, here, and here) They store a good chunk of my art and craft supplies as well as a handful of office supplies and files. Its been great having a “modular” system that we can rearrange and reconfigure as we move from place to place. For this reason, I really wanted to make them work in the loft. But they clearly needed a face lift! Ha!

It should also be said that you can still do this without these exact storage cubes. Ive seen great options at places like HomeGoods, Target, and Ikea. You cold also thrift a solid side table or use a small dresser you have on hand. The point is: this “technique” is easy to apply to nearly any piece of furniture you want to upcycle.

DIY Desk Part 2

After working with the peel and stick vinyl planks I knew I could use them to update the cubes. I emptied the drawers and cleaned them with a rag and some tabletop spray. I also removed all the hardware. Once the drawers were prepped I sat them face down on one of the planks with the backing still intact and marked the dimensions. I used a t-square to extend my lines and then scored with a box cutter. Its important you use a metal ruler for this as your box cutter can actually cut right into a wood or plastic version. The metal ones will give you a straight(and sturdy!) edge every time. After the planks are scored you can snap off the excess. This is waaaaay easier than I originally imagined!

DIY Desk Part 2

As I was getting my first drawer set up I also made a template for my hardware. Once the planks were attached they would be covering the preexisting holes and again Im not the type that is going to try measuring that out after the fact. So save yourself the headache (and time!) and do this before setting your planks! I just used a sheet of scrap card stock to measure where the holes would be when the top and side edges were lined up.

DIY Desk Part 2

Because these planks were going to live vertical(on the face of the cubes) I wanted to really make sure they were permanently attached. The adhesive that is applied to the back is pretty strong but if you really wanted to you could peel it up. I wanted to avoid any chance of that happening(even accidentally) so I hit the back with a small amount of Gorilla Glue. If you’ve never used GG you should know it needs to be under pressure/weight for an hour after applying it. Great way to get some more use out of those heavy art history books! #artschoolgrad

DIY Desk Part 2

While waiting for the GG to cure up I painted my hardware with 2 coats of chalk paint. I haven’t used it on something that gets this much handling but being that the part of the pull which is touched most is “under” the face I feel like it will hold up well. Yes, I have high hopes for chalk paint on this(big surprise right?) but I’ll be back after a few months with and update on this. Promise!

DIY Desk Part 2

DIY Desk Part 2

After an hour under a stack of books I attached the hardware using my template and filled the drawers up! Again, these 2 middle desks are an altered version of the original I posted in Part 1 but the change is pretty simple. Basically we’re using the cubes as the legs on one side of the desks. This makes the tops sit a bit higher than your average desk but I like being able to stand part time while working too.

DIY Desk Part 2

The desks being this height also meant we couldn’t use traditional office chairs. At their most extended height we were still sitting too low. We opted for these drafting chairs and we are loving them! They do have a foot rest(the metal ring at the bottom) but we added mini ottomans for anther option. And as a bonus they give us a bit of extra storage! Win win!

DIY Desk Part 2

So what DIYs have you added to your workspace? Are you working on a desk upcycle as well? You know I’d love to hear all about it in the comments!

DIY Desk Part 2
Continue Reading